Hatching Tips
Broody Hen Hatching
Mark the fertile eggs with a pencil to distinguish them from any additional eggs laid by broody hens during the incubation period. This helps you keep track of which eggs you initially placed under the hen.
– Dust the hen and nest box with PESTINE or POULTRY DUST POWDER before placing eggs to prevent mite or lice infestations. These pests thrive in warm environments and can harm your hen and newly hatched chicks by feeding on their blood if left untreated.
– If a broody hen is cohabiting with other hens in a coop, it’s advisable to provide her with a separate space. Hens often exhibit a peculiar behavior where they prefer to lay eggs where others are already laying, leading to potential disturbances for the broody hen. This can result in damaged eggs and discomfort for the broody hen. Providing her with a small, quiet area containing her nest, eggs, food, and water, shielded from the weather, ensures her comfort and minimizes disruptions during the incubation period.
– There’s no need to forcibly remove the broody hen from her nest for eating and drinking. She instinctively knows when to briefly leave the nest for these necessities. Brooding is physically demanding for hens, and providing them with high-protein foods such as sardines in springwater, along with quality pellet food, can help replenish their energy reserves during this period.
– Mark the fertile eggs with a pencil to distinguish them from any additional eggs laid by broody hens during the incubation period. This helps you keep track of which eggs you initially placed under the hen.
– Dust the hen and nest box with PESTINE or POULTRY DUST POWDER before placing eggs to prevent mite or lice infestations. These pests thrive in warm environments and can harm your hen and newly hatched chicks by feeding on their blood if left untreated.
– If a broody hen is cohabiting with other hens in a coop, it’s advisable to provide her with a separate space. Hens often exhibit a peculiar behavior where they prefer to lay eggs where others are already laying, leading to potential disturbances for the broody hen. This can result in damaged eggs and discomfort for the broody hen. Providing her with a small, quiet area containing her nest, eggs, food, and water, shielded from the weather, ensures her comfort and minimizes disruptions during the incubation period.
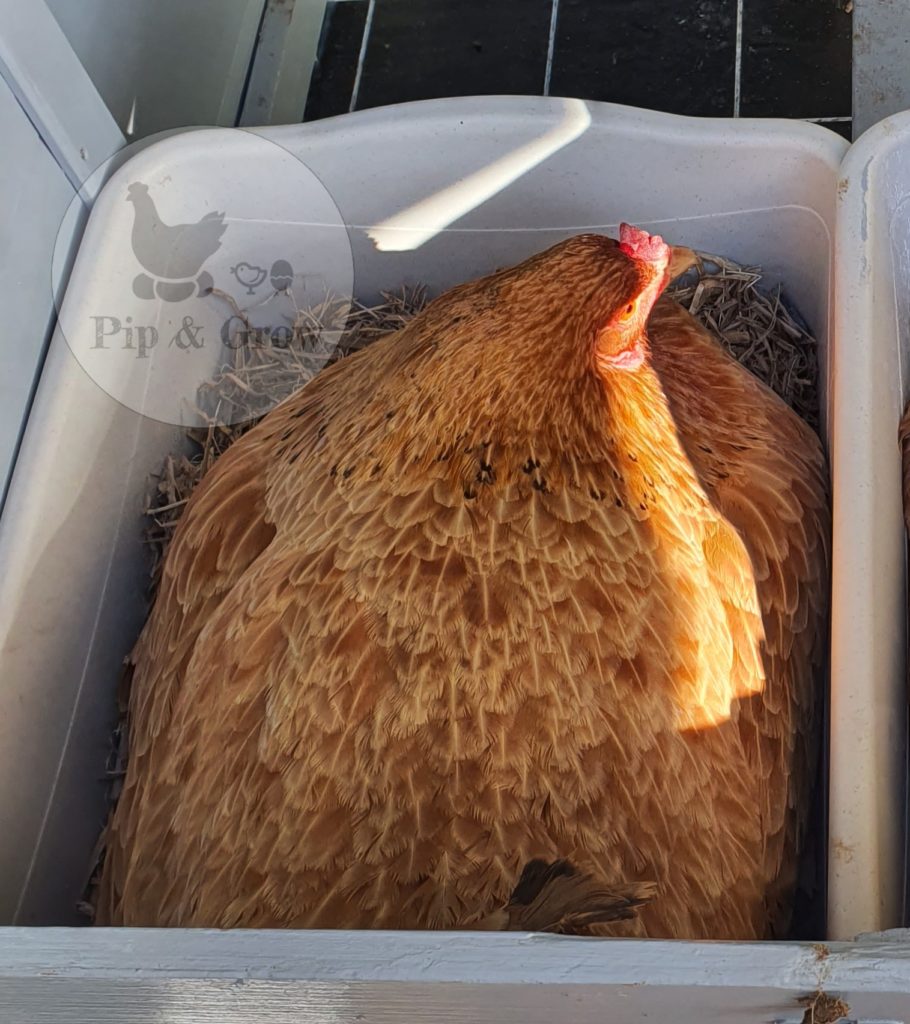
-There’s no need to forcibly remove the broody hen from her nest for eating and drinking. She instinctively knows when to briefly leave the nest for these necessities. Brooding is physically demanding for hens, and providing them with high-protein foods such as sardines, along with quality pellet food, can help replenish their energy reserves during this period.
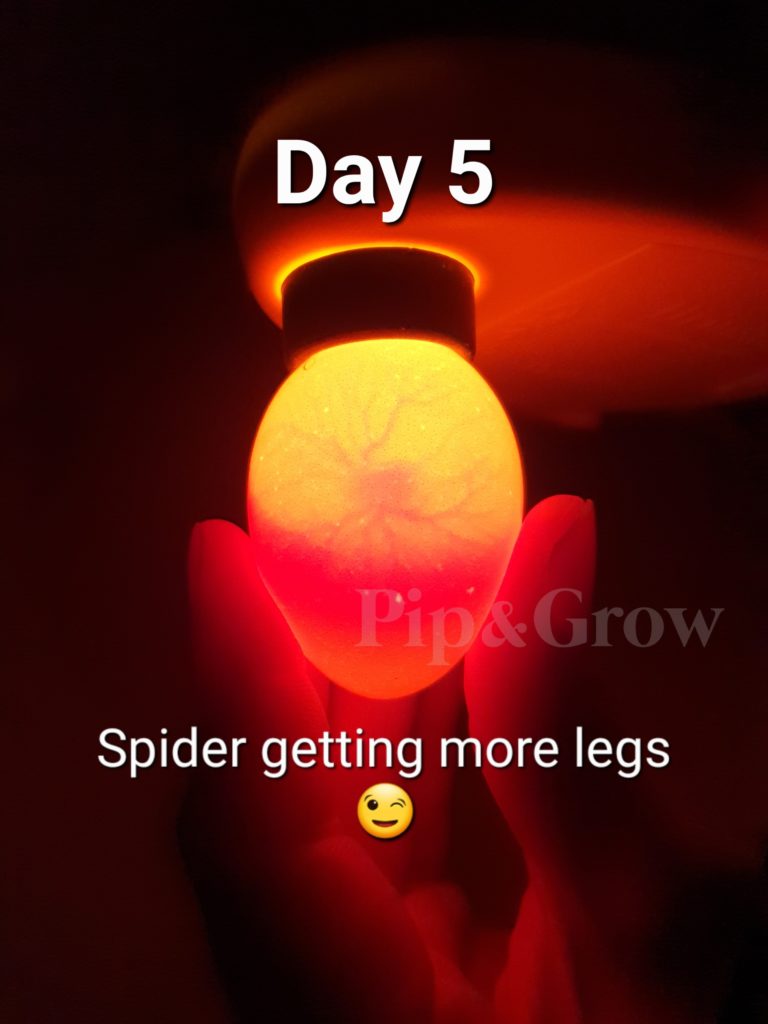
“CANDLE YOUR EGGS” to check for signs of development, such as visible veins, a small dark spot, or other indicators of life. Any eggs that remain clear should be discarded.
A broody hen is not foolproof—her incubation can be disrupted by various factors, including interference from other hens, mite infestations, weather conditions, or even nocturnal visits from rodents and more.
Candling eggs, even under a broody hen, is essential to ensure she is not wasting her time and energy on non-viable eggs. This also allows the owner to make informed decisions; source new eggs asap or dayold?, rather than waiting the full 21 days. Click here to view DAY 5 candling video
If you have concerns about the fertility of the eggs, between day 7-10 after first candling is the best time to contact the seller with photo or video evidence and seek advice..
Most sellers have a “No Responsibility” policy once eggs leave their hands, as there are many factors that are beyond the seller’s control. While some may offer replacements as a goodwill gesture, this is entirely at their discretion. At Pip & Grow, we offer compensation if total viability falls below 50%. Please refer to “Viability Matters” for more details.
Click here to view DAY 13 candling video
Click here to view Day 19 final candling Video
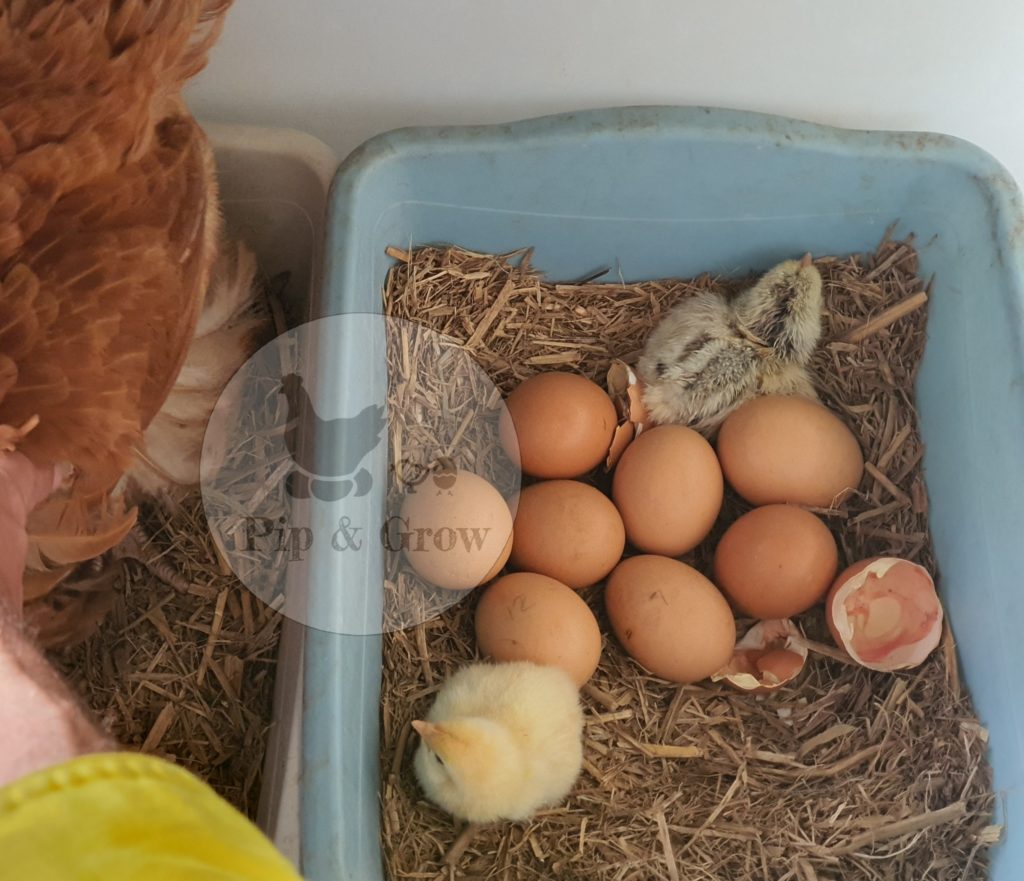
– The incubation period for chicken eggs can vary, usually lasting between 19 to 24 days. As the hatch date approaches, the hen becomes less mobile and more sensitive. It’s best to avoid unnecessary disturbances and refrain from checking the eggs unless there’s a specific reason, such as a broken egg.
– Please leave her alone and refrain from trying to look under her to see the chicks. She will take them out for a feed when they are dry and ready, which can take up to 48 hours. If any eggs are left unhatched after the hen leaves the nest, discard them.
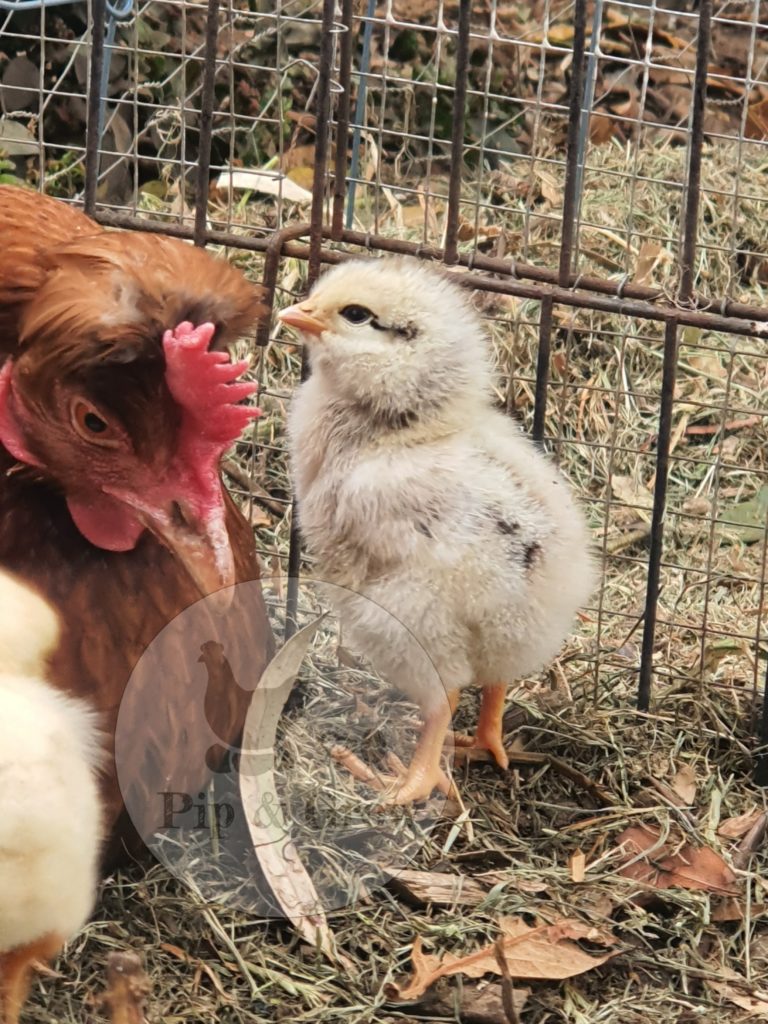
– Ensure your pen is securely enclosed, as chicks have a knack for squeezing out through remarkably small openings. If they wander off, they may struggle to find their way back, especially without their mother’s guidance. Mama hen cannot escape to assist them, and they cannot survive long without her warmth. Additionally, be wary of crows and other predators, as they are opportunistic and may prey on unprotected chicks without hesitation.
– Please see Chick Care Tips for more info.
*All of our chicks are hatched in an incubator, vaccinated and kept in a sterilized brooder. The photos were taken in 2013 before we began using our Pip and Grow journey.